Hi everyone, we are Visionaries Toastmasters club, having a meeting in Kawasaki-shi, Japan.
Unfortunately, we cannot have an on-site meeting as well as other world wide toastmasters members in order to avoid spreading novel coronavirus… and we are having an on-line meeting instead.
It is working by the help of ZOOM surprisingly.
However, we felt playing a timer role becomes much complicated such as changing physical cards and being recognized hardly due to small ZOOM tile window. In addition to that, in this digital era, we were getting skeptical about keep doing this. Cannot be digitalized?
Today, let us share our club’s way to play a timer role. It is kind of easy and automated solution, and working in our club very well.
By the way, if you have an interest in our club, please join us ! We are having on-line meeting for a while and will welcome you in the meeting. Meeting schedule will be updated thru twitter.
How on-line toastmaster’s timer role can be improved? See the example here
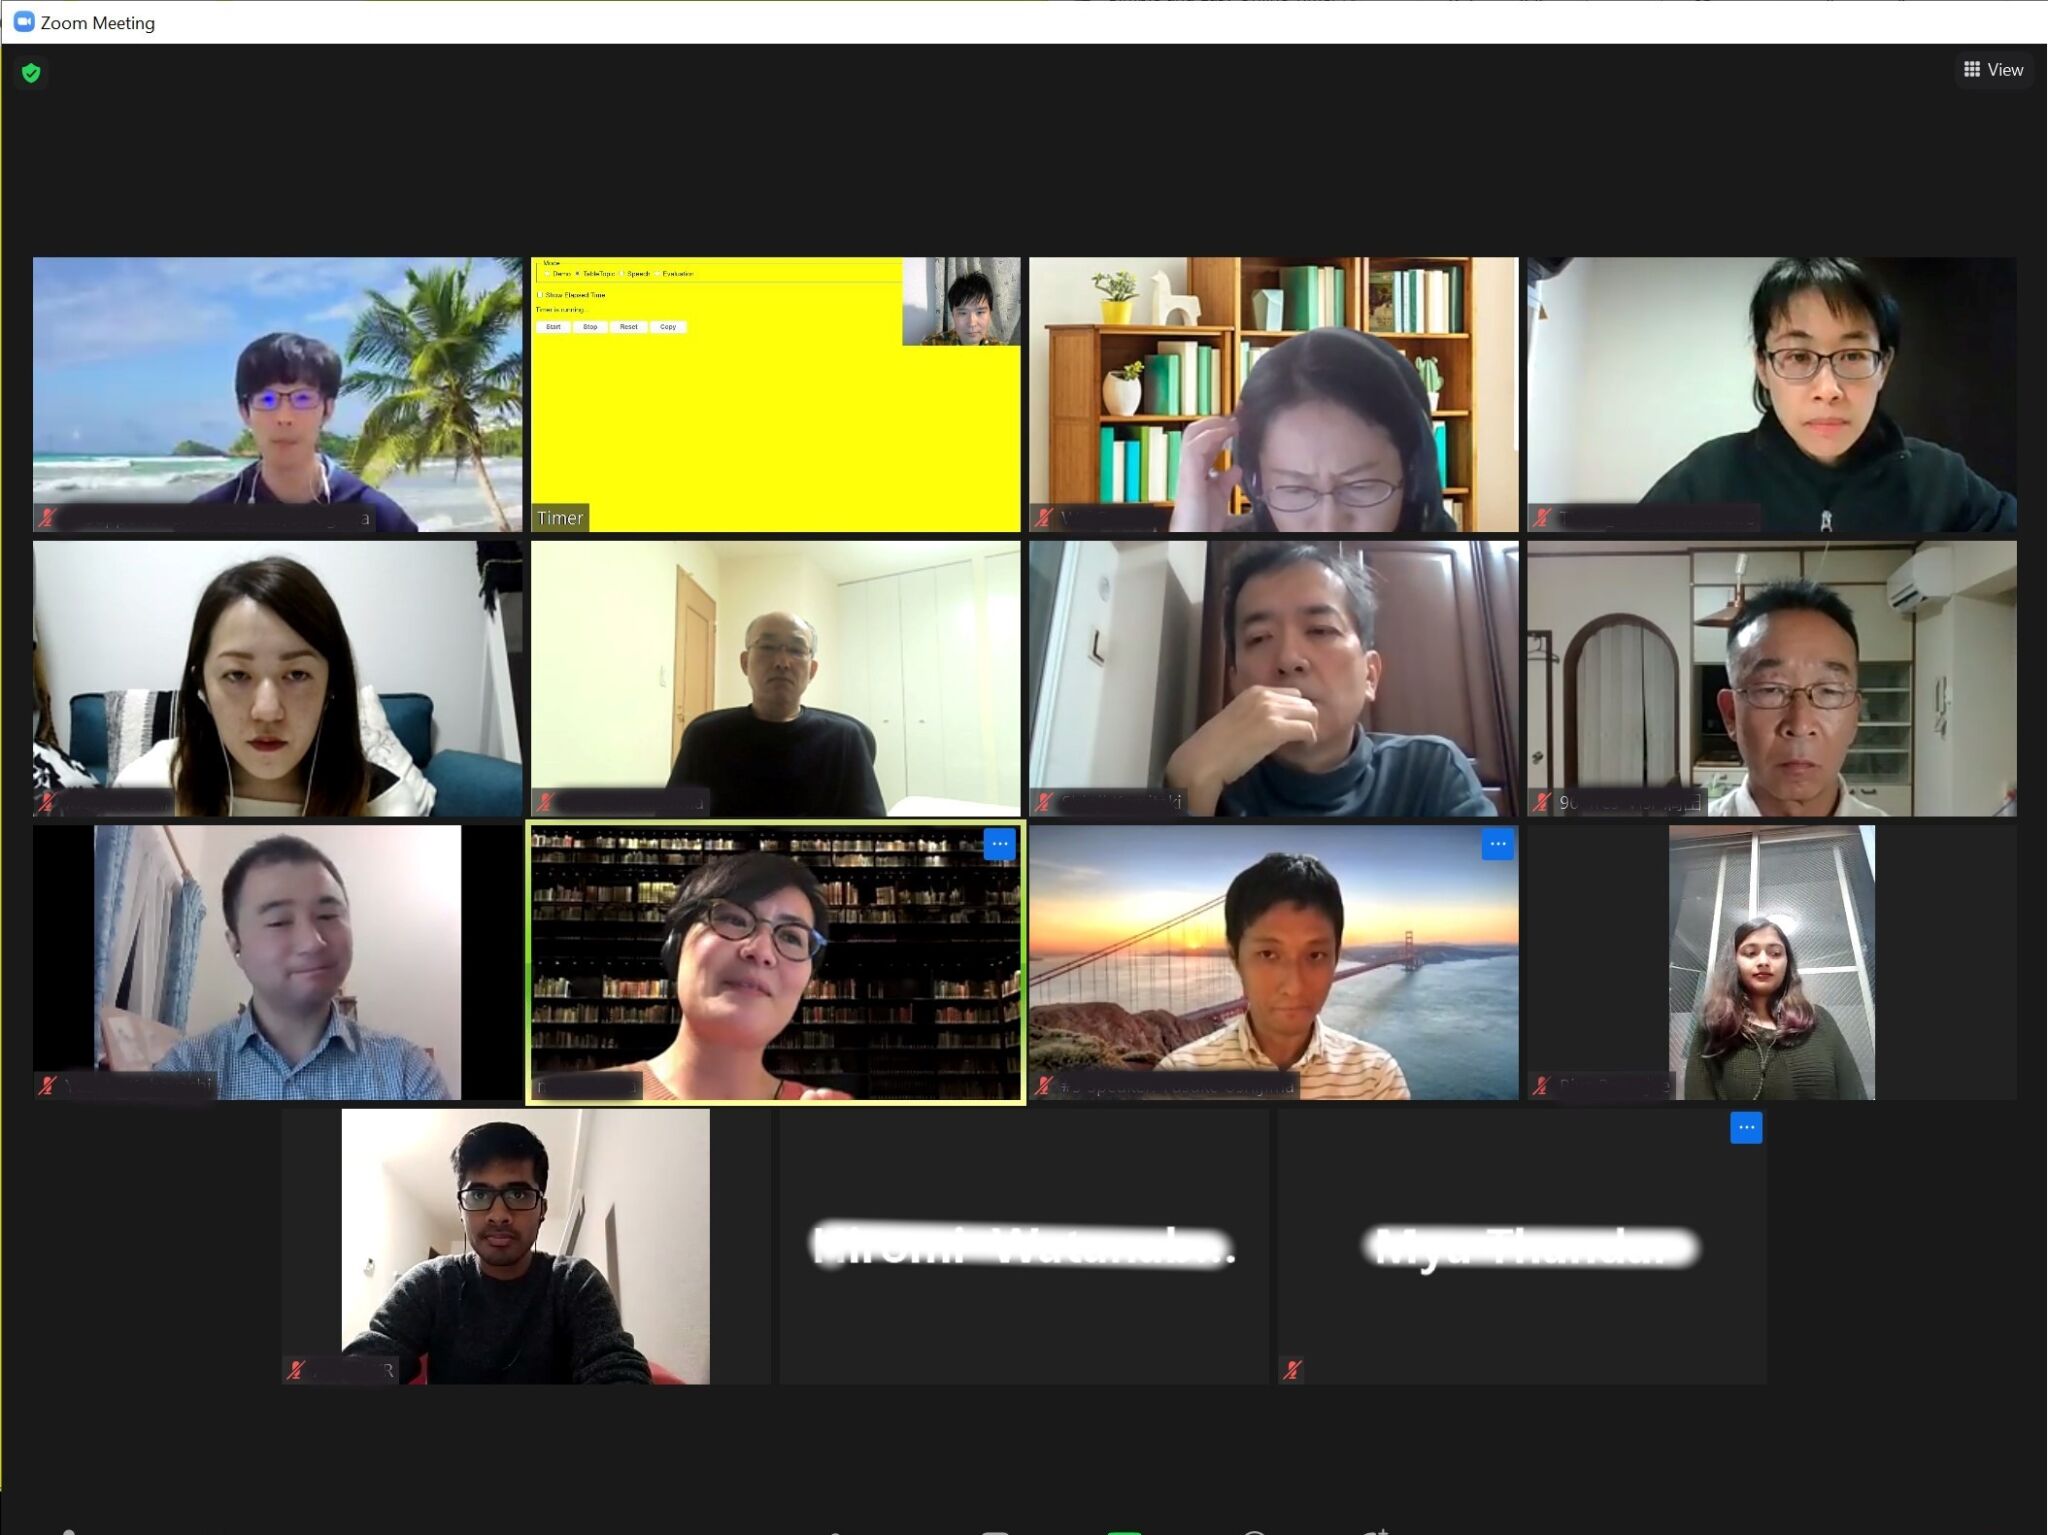
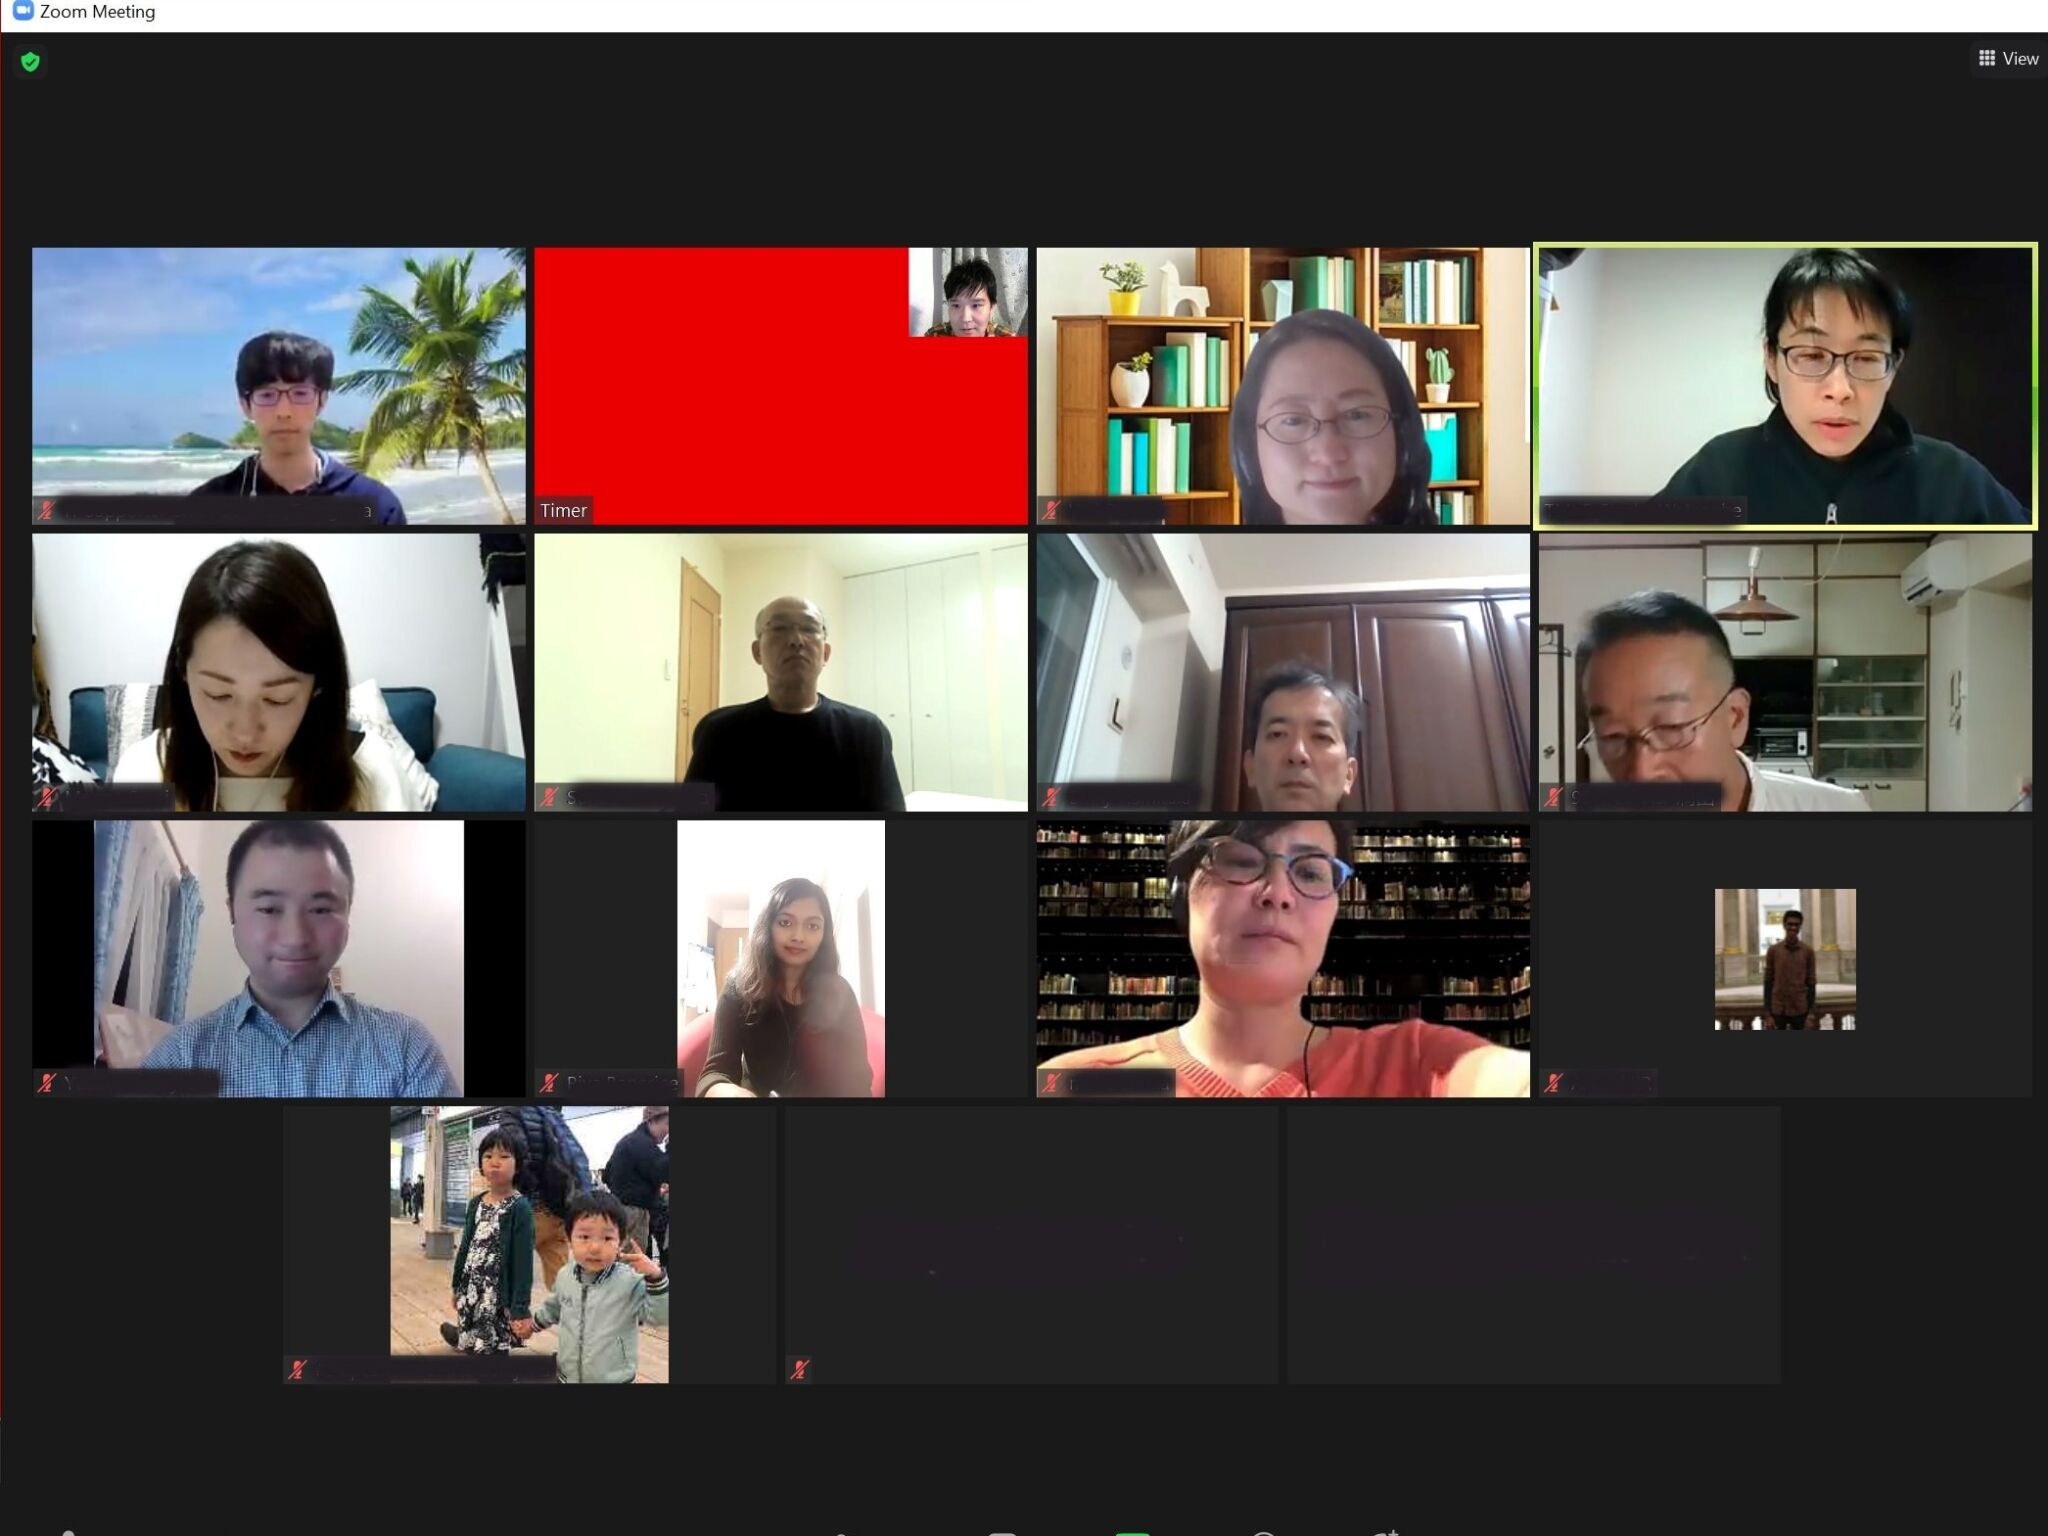
Please see snap shot of our actual on-line meeting here. You can see one tile which has picture in picture style and the most of spaces is playing a time role.
He (actually me) is showing his web-browser as his background and overlaying his web camera. This kind of overlay is often seen at YouTube, Twitch, where speaker wants to share their screens to audiences.
Web browser is set as main background in this case and the browser is running web application for our club speech. It will change the color like white -> green -> yellow -> red, in accordance with elapsed time automatically.
As you might be aware, as a by-product, it reduces timer’s work significantly. Timer assignee just needs to do two actions, Start / Stop. No need to be careful of changing cards, the web application changes instead of the timer assignee, and it is more accurate than human, no surprisingly.
Setup: Live Streaming Tool
Install any steaming tool. Our club is using OBS studio, which is free and easy to manipulate. Here, we’d like to share our setup with using OBS.
For the installation / Setup, you can find how-to video on You-tube. The following explanations are just for a reference, you might be interested in.
Install OBS
Go to OBS homepage, and get an appropriate one to your PC.
Settings of Output / Video
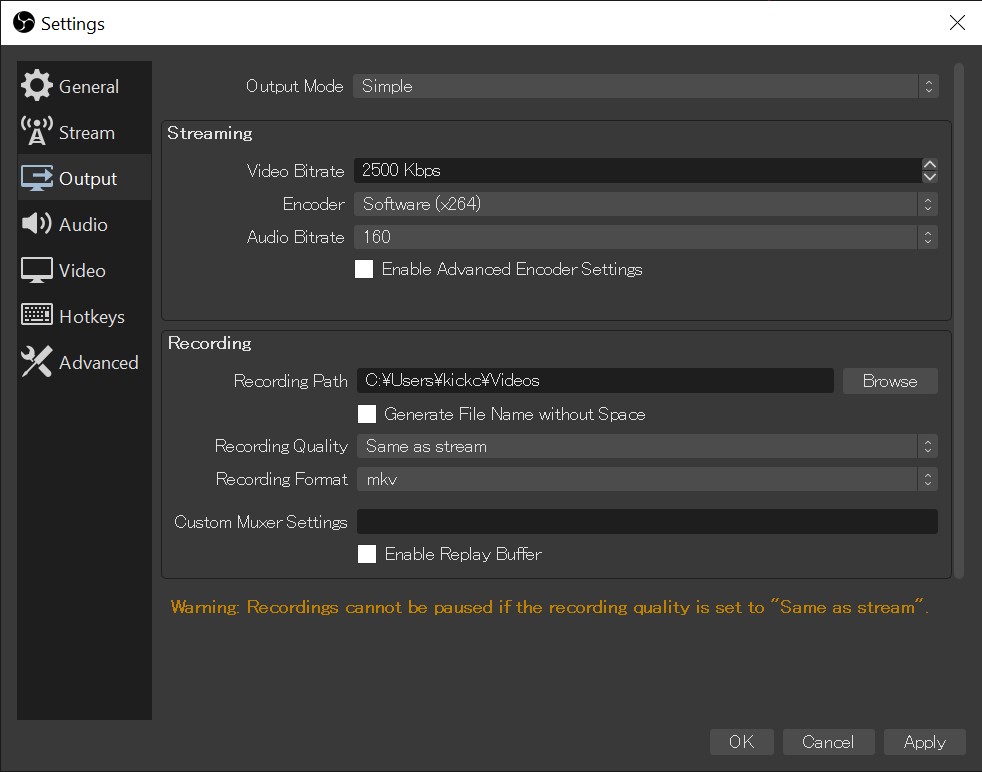
Output setting controls streaming band width and encoding method. Better streaming quality requires higher band-width on your network, it is totally up to the environment you are using. Looks like encoding is available x264 or hardware(nvenc). If hardware option is available, better to choose because it will free up CPU usage, which also being consumed by Zoom.
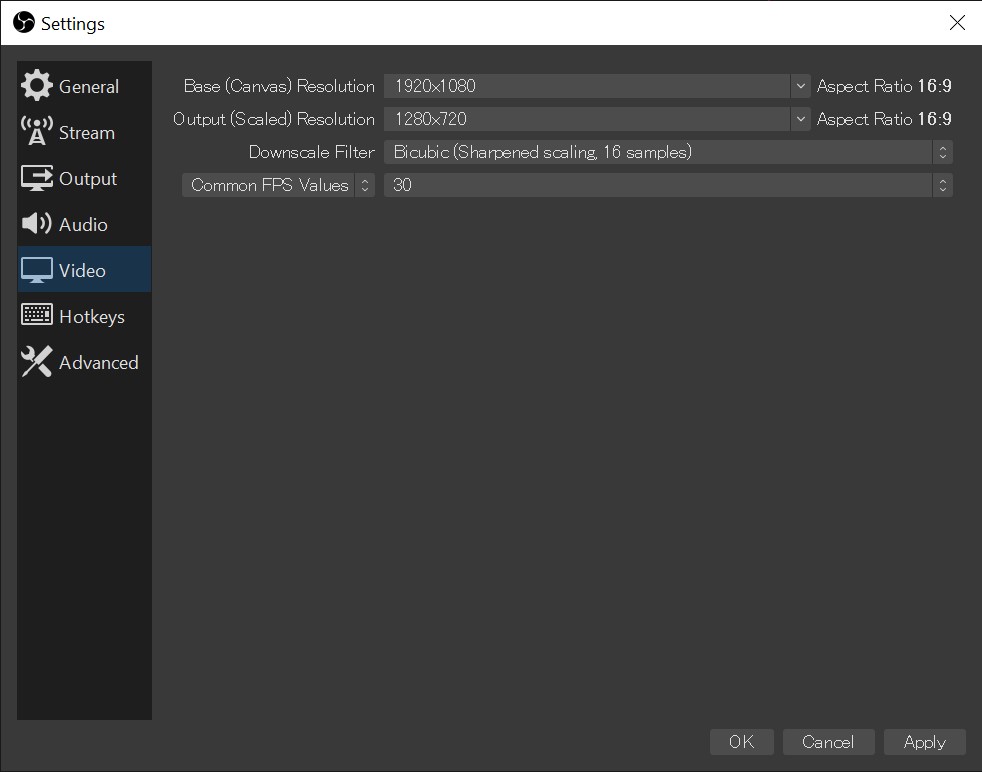
Video setting controls actual resolution and frame rate. Base resolution is input resolution and that will be down-casted to actual streaming resolution. FPS is set to 30 and should be good enough.
Window capture and Video capture
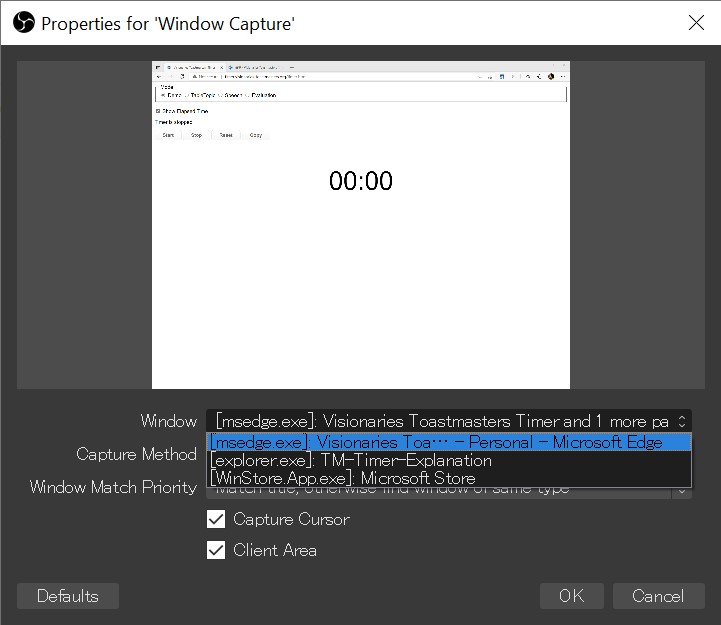
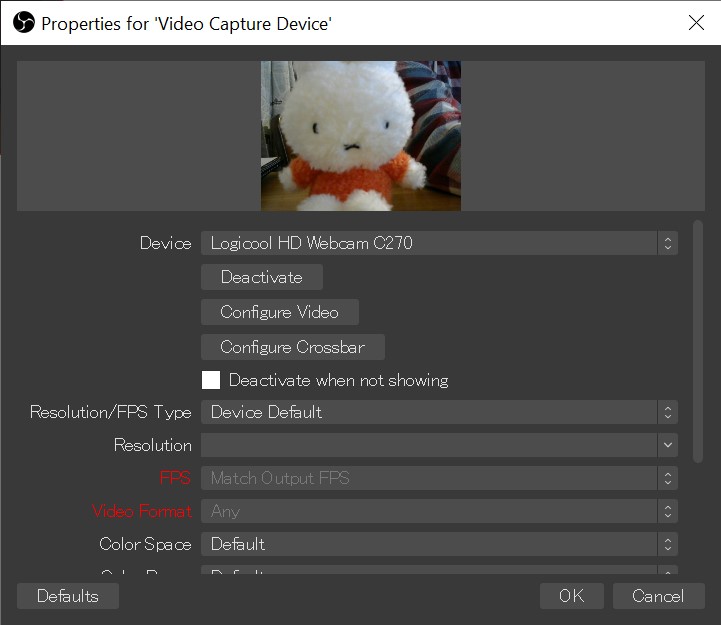
Window capture enables capturing any application including Web Browser. Our club is using Window capture capability to reflect browser content, which is running timer tool, dynamically. Video capture enables capturing webcam images, detected on your computer.
Configure Sources
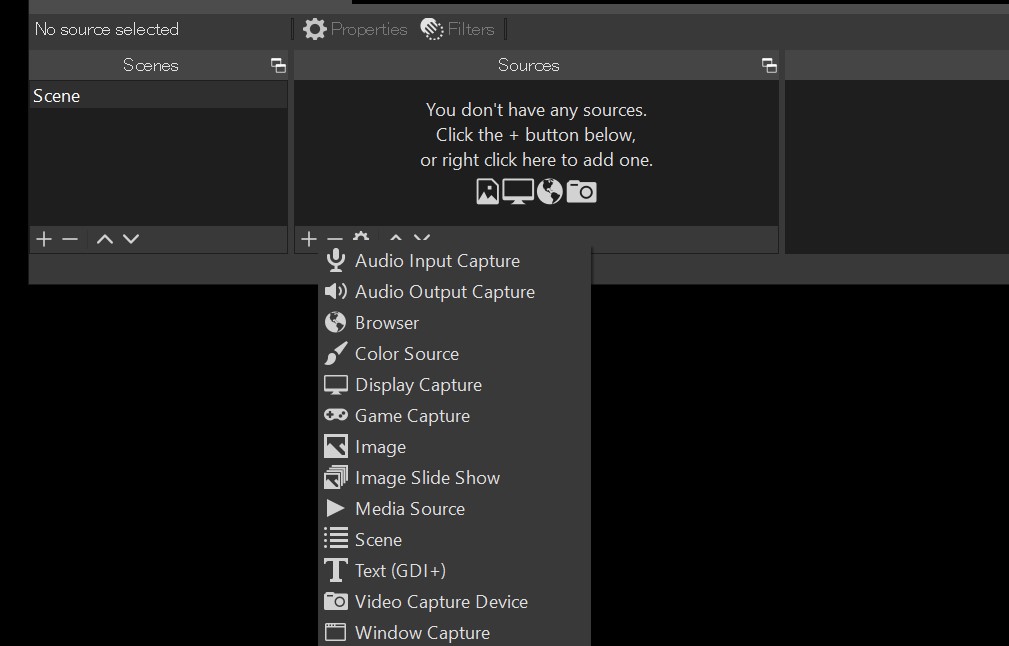
In order to set these two resources, please find Sources from small window like below. Double-Click will let you configure each souce.
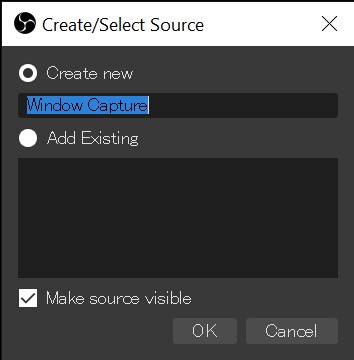
If double-clicked, you will see below image. Any name is fine.
Example of Window capture. This example sets web browser, which is showing timer content
Example of Video capture
Two sources are now being located in one pallet.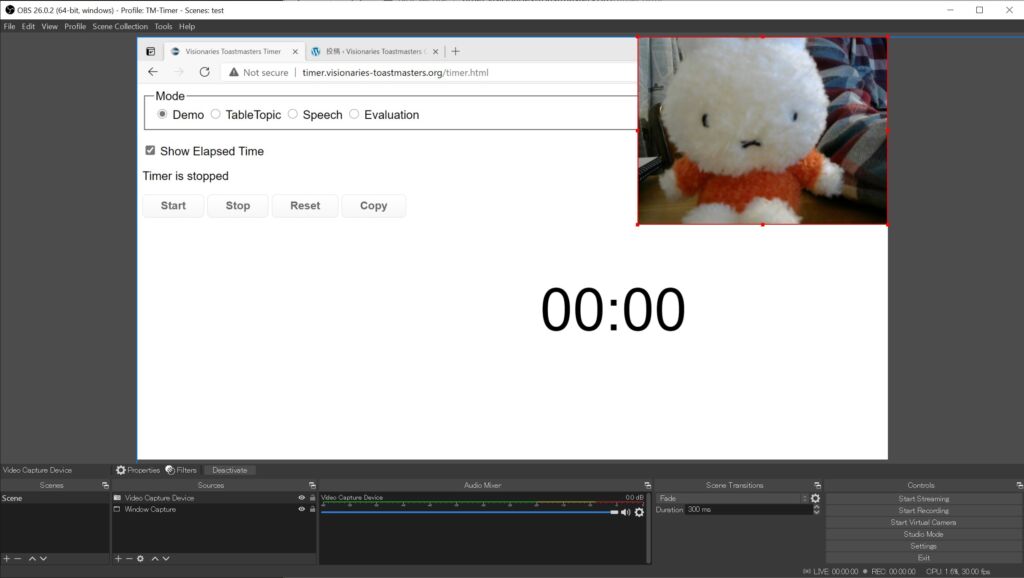
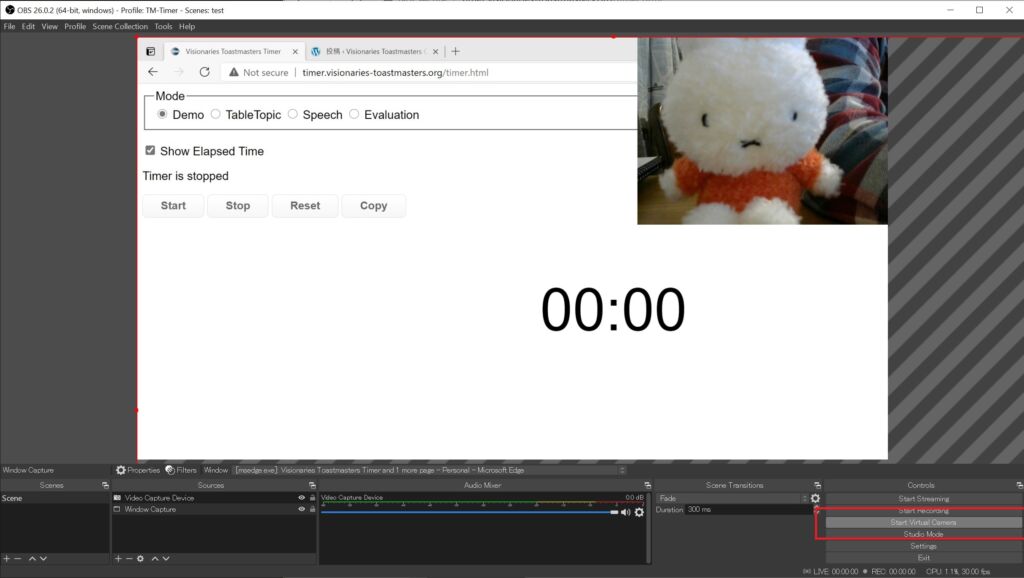
Start virtual camera
Once everything is set, start streaming. Go to right bottom and hit “Start Virtual Camera”. Now you are ready to play a timer role on Zoom.
Zoom setup
Set-up at Zoom is quite easy. You just need to choose “OBS Virtual Camera” as your resource to play a video.
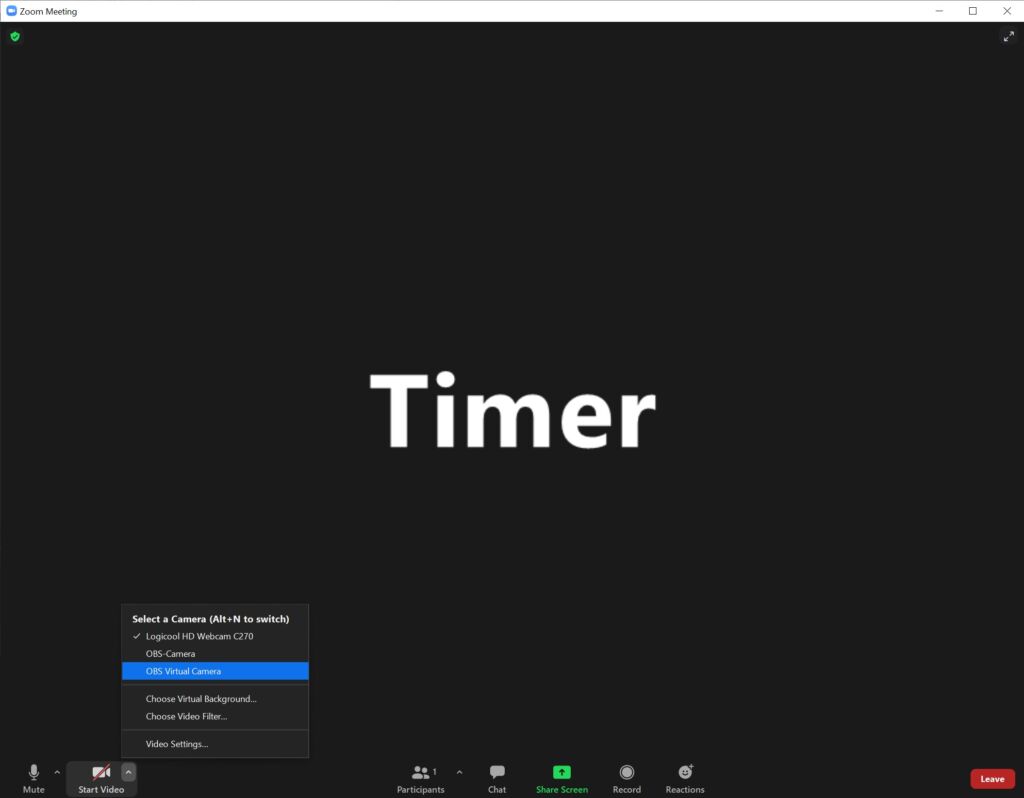
Now you are showing web-browser and your face simultaneously.
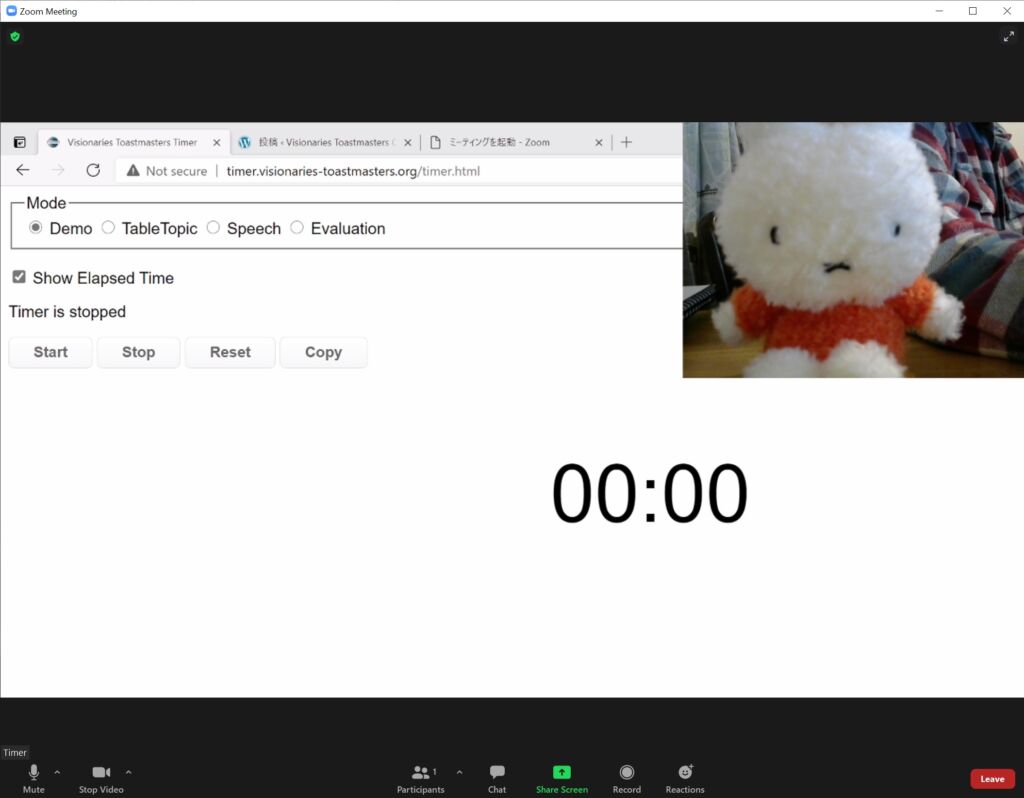
Web application example
Maybe below web-sites are useful as a background as a timer.
- https://tmtimer.calebgrove.com/
- Our club original: http://timer.visionaries-toastmasters.org/timer.html
I have just realized there is an existing web-application which does what I developed. The 1st one looks better.


